![]()
Unable to Fetch Weather
No Information Available.
Sunrise: No Information Available
Sunset: No Information Available
```
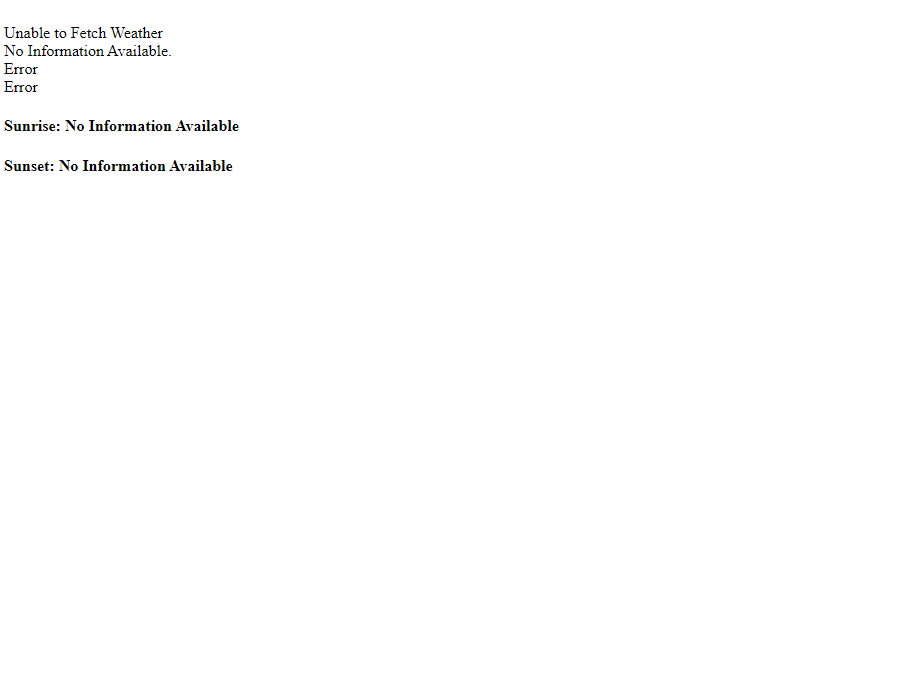
In the above code, you can see we are using multiple `div`s with classes and IDs. The classes and IDs are important because we will be using those to interact with the DOM. In the HTML file, we link the CSS file called **styles.css** and the JavaScript file called **scripts.js**. The whole information section is wrapped under a `div` named `container`. The `container` contains an image tag with a blank `src` attribute, another `div` with an **ID** of location. The `div` has a text saying "Unable to fetch weather". A `desc` class is added under the location that will show the summary of the weather. And then, we are wrapping the temperatures inside a `div` called `weather`. The weather class consists of three classes to show Celcius's temperature, Fahrenheit, and a `div` to separate them. Finally, two `divs` are used to indicate sunrise and sunset timing.
All the div's text will be shown when the browser cannot get the users' geolocation.
Up to this point, our markup will look like this, if you open the above HTML file in browser,
## Styling the Markup
Now it's time to style our app. The styling is also effortless. But before we start styling our app, please make sure you know about CSS flexbox. If you are not familiar with flexbox, check our two-part flexbox series.
- [CSS Flexbox Part 1](https://nemotivity.dev/a-guide-to-css-flexbox-part-i-ckpw5u9az0d8uzls1c35j3f4q)
- [CSS Flexbox Part 2](https://nemotivity.dev/a-guide-to-css-flexbox-part-ii-ckq7qa3pr09ouh4s15i937xak)
Before starting to style our project, we will reset the default margins and paddings of the page.
```css
* {
margin: 0;
padding: 0;
box-sizing: border-box;
}
```
We will use the Lora font for the whole document. We will add the `font-family` into the body section. The asterisk(*) is a global selector that selects all the elements, and after selecting all the elements, we are setting the margin and padding to 0. The `box-sizing:border-box` makes working with flexbox easier.
```css
body {
font-family: 'Lora', serif;
}
```
The **serif font is a fallback to the Lora google font**. Now let's start designing the container. First of all, we need to set up a height and a width. We'll be using **100 viewport height** and **100 viewport width** for the container. Then, to center the elements in our app, we'll take the help of CSS flexbox. To invoke flexbox, we need to specify `display:flex` in the container first. To center the elements along the main-axis, we use `justify-content:center`, and to center along the cross-axis, we use `align-items:center`. We also use the `flex-direction: column` here to align the items along the vertical axis. For the background, I am using a **radial gradient background**. To speed up the process, I am using an online gradient generator tool. The final container styling is pasted below.
```css
.container {
height: 100vh;
width: 100vw;
display: flex;
align-items: center;
justify-content: center;
flex-direction: column;
background: rgb(251, 242, 133);
background: radial-gradient(
circle,
rgba(251, 242, 133, 0.6334908963585435) 0%,
rgba(224, 196, 91, 0.8407738095238095) 35%,
rgba(230, 224, 113, 1) 100%
);
}
```
We will design the temperature section now. It is inside a `weather` class div. We are using a flexbox here also.
```css
.weather {
display: flex;
align-items: center;
margin: 15px 0;
font-size: 1.5rem;
}
```
To add some space below and top of the temperature `div`, we add some top and bottom margins. To style the location, we are using an ID of location. And for the description, a class `desc` is used.
```css
#location {
font-size: 3rem;
font-weight: 800;
font-style: italic;
}
.desc {
font-size: 1.25rem;
text-transform: capitalize;
}
```
I think the above lines doesn't require any explanation. It is pretty self-explanatory. The `text-transform: capitalize` property capitalizes the first letter of each word. And we are using **rem units** here for flexibility. Finally, to create the circle between the two temperatures, we are using a div called `circle`. We are giving it a **height and width of 15px** and then adding a `border-radius` of **50px**, making it a circle.
```css
.circle {
background-color: black;
border-radius: 50px;
height: 15px;
width: 15px;
margin: 0 15px;
}
```
Our styling for the app is done. Now it is time for the fun part. Before directly jumping to the JavaScript part, let’s first understand a few basic concepts.
## Getting Data from API
The first thing to understand is how do we get the weather data? To get the data, we are dependent on a third-party service. We will use a website called [OpenWeatherMap](https://openweathermap.org/). **OpenWeatherMap** is a service that provides various weather data through API. We can integrate the API into our app and can use the data on our website. An API is like a waiter, it works as a medium between the server and the client to serve the data to the client according to the client's request.
OpenWeatherMap is free up to a certain number of requests. After that, it charges money. To use the API, we need an **API key**. Let's see how we can get our API key:
**Step 1:** Open [OpenWeatherMap](https://openweathermap.org/) and click on Sign In:

**Step 2:** Click on "**Not Registered? Create an account**", if you don't have an account,

**Step 3:** Fill out the form and click on sign up to create your account.
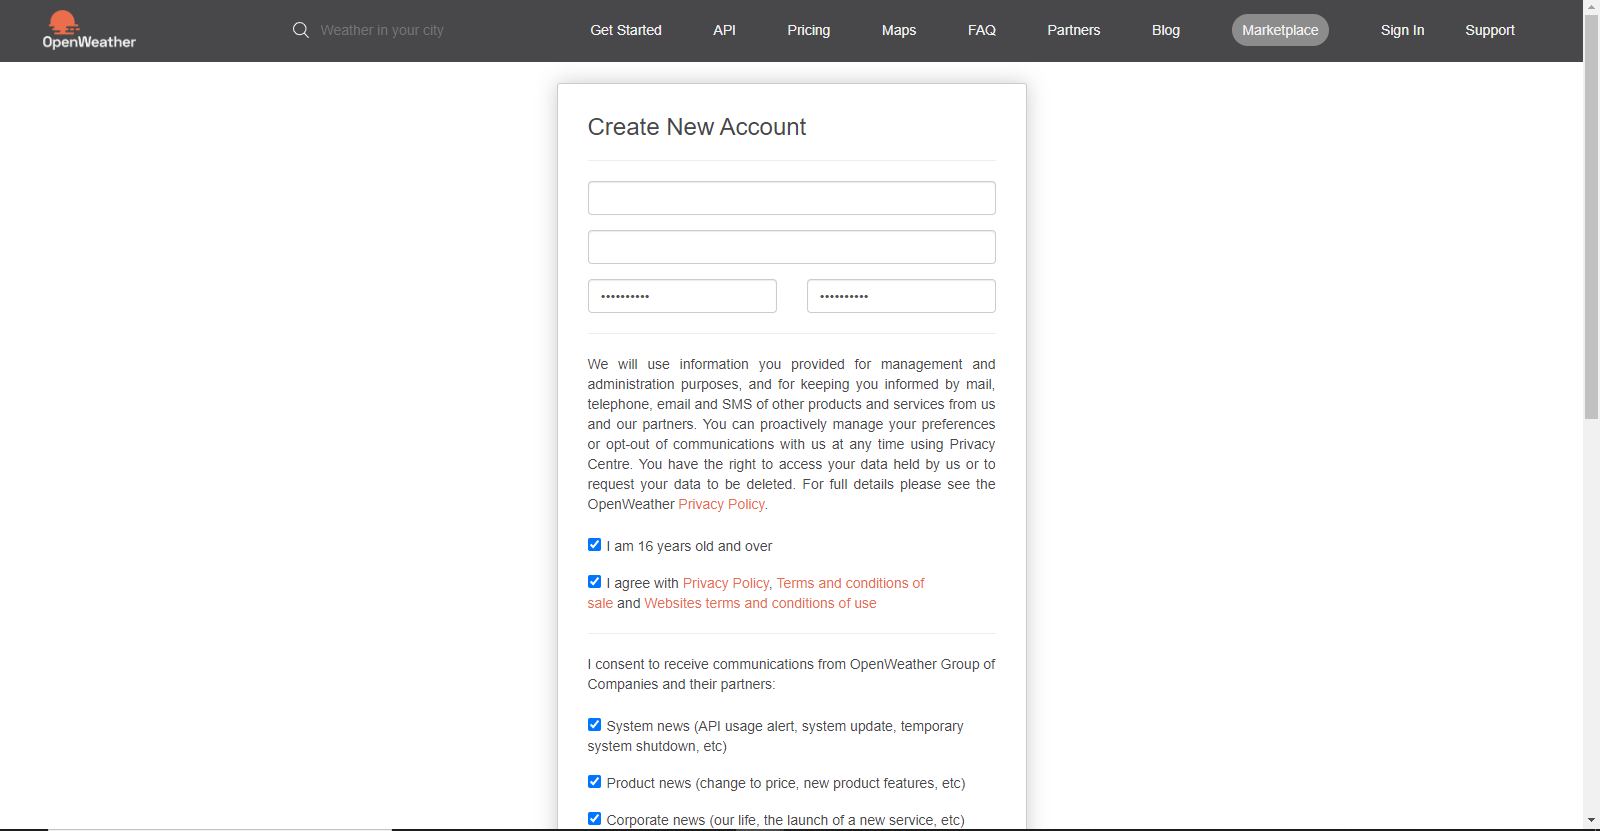
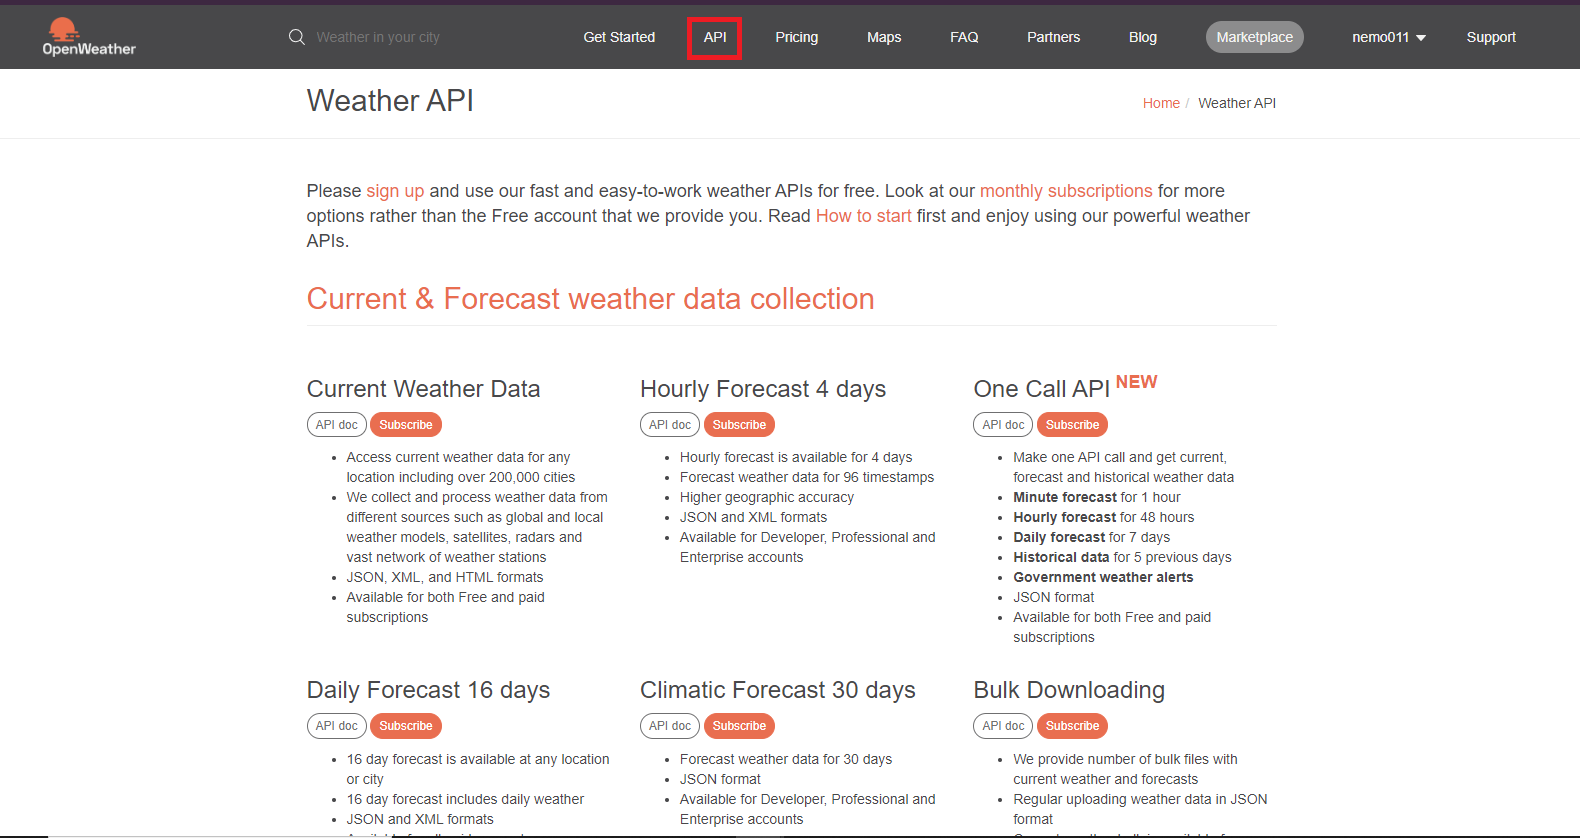
**Step 4:** Click on **API** on the menu
**Step 5:** Because we need the current weather data, we will need to subscribe to the **Current Weather Data API** subscription. It is the first option you will see in the menu. Click on **Subscribe**.
**Step 6:** Now, the pricings window will open. We don't need any paid plan for this hobby project. So, select the free option here, and we are almost done.

**Step 7:** After subscribing to it, in the top right corner, where your profile name appears, click on it, and select **My API Keys**
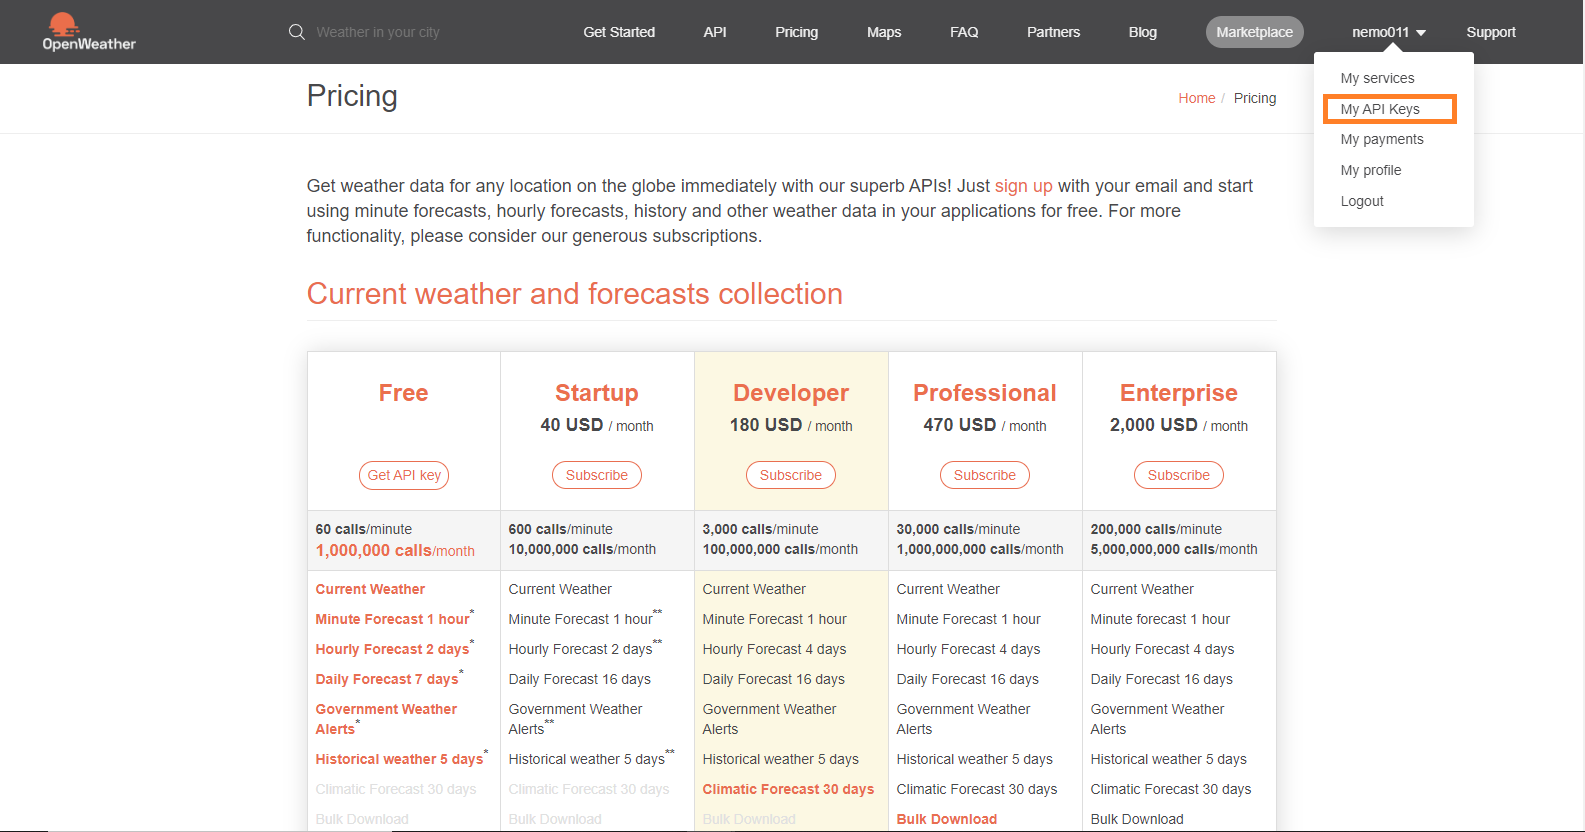
**Step 8:** You will find your API key here. Keep it safe, and do not share it publicly with anyone.

Now that we have our API key, we can move forward to building our app again.
In this app, we get the **user's geolocation** to show weather data according to the user's place. To get the geolocation data, we first have to know about the **navigator object in JavaScript**. The navigator object in JavaScript is used to fetch information related to the user agent or the browser. This object has a property called `geolocation`. By using this property, we can get the user's latitude and longitude. To know more about the `navigator` object, check out this awesome article [here](https://www.studytonight.com/javascript/javascript-navigator-object).
#### **Also Read: [Build a Piano App using JavaScript](https://nemotivity.dev/build-a-piano-app-using-javascript-ckpqfnqsg0ds5xis1eo5id8hd)**
## The JavaScript Part
The first thing that we need to do in our `scripts.js` file is to create a variable to store the API key.
```javascript
// OpenWeatherMap API. Do not share it publicly.
const api = '66869939e0b182ac2d6***********'; //Replace with your API
```
I am creating a variable called `api` and storing my API key there. The next step is to create an event listener that will fire up when the page loads. So, the event we are looking for is `load` here. And when the page loads, it will execute some function that we define.
```javascript
window.addEventListener('load', () => {});
```
As you can see, we are using an **arrow function** here. Inside the function, we will create two variables called `lat` and `long` to store the user's latitude and longitude. And then, we will use the `navigator` object to get the latitude and longitude of the user. We will use an if statement here because many browsers do not allow access to the location. If you want, you can also add an else statement for cases when the location is not available. But for the sake of simplicity, I’ll only use the if statement in this tutorial.
```javascript
window.addEventListener('load', () => {
let long;
let lat;
// Accessing Geolocation of User
if (navigator.geolocation) {
navigator.geolocation.getCurrentPosition((position) => {
});
}
});
```
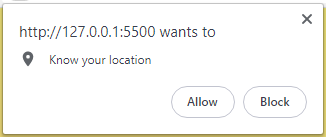
The `if(navigator.geolocation)` method will check if the object is available in the browser. If it is available, then we will call a method called `getCurrentPosition` which is available on `geolocation` property. We pass in an argument of `position` inside the `getCurrentPosition` method. We can name anything for the argument that we are passing. Now, if we console log the position, we will be able to see that we are getting the latitude and longitude. But before showing the values, the browser will ask for our permission to allow the location access.
If you allow your browser to access the location, the console will show your location.

It throws multiple values. But we only need the latitude and longitude values for our app. So, we'll store these two values inside the variables that we declared before.
```javascript
window.addEventListener('load', () => {
let long;
let lat;
// Accesing Geolocation of User
if (navigator.geolocation) {
navigator.geolocation.getCurrentPosition((position) => {
// Storing Longitude and Latitude in variables
long = position.coords.longitude;
lat = position.coords.latitude;
});
}
});
```
Every API has a base URL. By giving some arguments to that URL returns the information that we need. For OpenWeatherMap, this URL is `https://api.openweathermap.org/data/2.5/weather?`, after the question mark(?), we provide some information to the URL, and it returns the values in JSON format. All the API calls are well described in the official documentation of OpenWeatherMap. You can visit their page [here](https://openweathermap.org/current). To get the data for a particular latitude and longitude, the below format is used.
```sh
https://api.openweathermap.org/data/2.5/weather?lat=${lat}&lon=${long}&appid=${api}&units=metric`
```
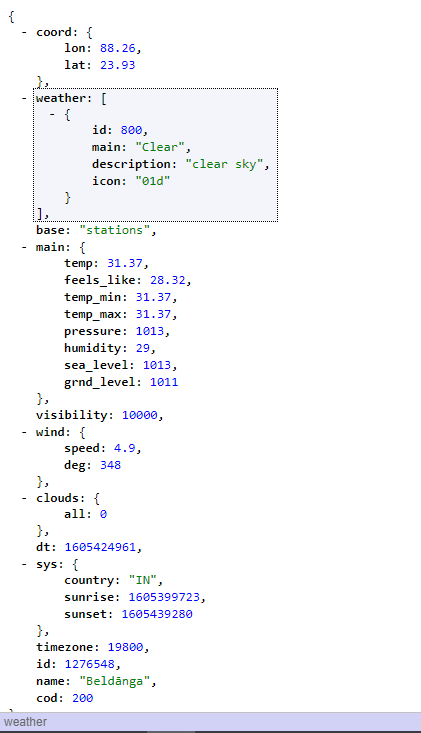
Where `${lat}` is the latitude of the user, `${long}` is the longitude of the user, `${api}` is the API key provided by OWM, and at the end, `units=metric` is to get the weather data in celsius. We need to store the complete URL inside some variable. For this tutorial, we are storing it inside a variable called `base`. After storing it into a variable, if you console log it, you will get a proper URL in return. Now, if you open the URL, you can see all the different information available to you.
Now somehow, we need to extract all these data and show it into our app. Here comes the use of promises and object destructuring. Javascript Promise in itself a vast topic.
Now it is time to use the JavaScript Fetch API. The fetch API enables us to call and get data from API services. We will pass in the base variable inside it. The value that is returned after passing the base URL needs to be converted into JSON format so that we can use it in our app. So, after the first call, we return the response by transforming it to JSON.
```javascript
if (navigator.geolocation) {
navigator.geolocation.getCurrentPosition((position) => {
// Storing Longitude and Latitude in variables
long = position.coords.longitude;
lat = position.coords.latitude;
const base = `https://api.openweathermap.org/data/2.5/weatherlat=${lat}&lon=${long}&appid=${api}&units=metric`;
console.log(base);
fetch(base).then((response) => {
return response.json();
});
});
}
```
The return `response.json();` converts the response to a JSON object. After we get the JSON object, we will extract the values we need for our app. This is done by using JavaScript object destructuring. A brief article about object destructuring can be found [here](https://nemotivity.dev/object-destructuring-in-javascript-for-beginners-ckd901fae00n5qus1ebko8j2r).
```javascript
if (navigator.geolocation) {
navigator.geolocation.getCurrentPosition((position) => {
// Storing Longitude and Latitude in variables
long = position.coords.longitude;
lat = position.coords.latitude;
const base = `https://api.openweathermap.org/data/2.5/weather?lat=${lat}&lon=${long}&appid=${api}&units=metric`;
// Using fetch to get data
fetch(base)
.then((response) => {
return response.json();
})
.then((data) => {
const { temp } = data.main;
const place = data.name;
const { description, icon } = data.weather[0];
const { sunrise, sunset } = data.sys;
});
});
}
```
So, after getting the data in JSON format, we extract the values that we are going to use. If you console log the data now, you'll be able to see we are getting all the data that was previously shown through the base URL. We are extracting the `temp` from the `main` object and storing it into a variable of the same name `temp`. We are getting the name of the place from the `name` key of the object. The description and icon code is available in the `weather` array inside the object. We only have one array. So, we are accessing that array to get the two values. And finally, the `sys` object stores the sunrise and sunset time. We are also storing them into variables of the same name. If you console log the different values now, you’ll be able to see it. But you might get confused about two things, the first one is the sunrise and sunset time and the second one is the icon. Let's first talk about the icon code. OpenWeatherMap provides icons depending on various weather conditions. And, to show the icons, it gives some icon code. Providing the icon code in a particular URL will return the image. You can see all the icons [here](https://openweathermap.org/weather-conditions). The icon URL is http://openweathermap.org/img/wn/${icon}@2x.png; if we replace the `${icon}` with the icon code, we'll get the icon according to the weather condition. Now, let's talk about time. The time that is returned by the API is in epoch format. So, to make it human-readable, we need to convert it to GMT time first. The formula to convert epoch time to GMT using JavaScript is,
```javascript
const timeInGMT = new Date(epochTime * 1000);
```
So, we are getting two different times that are to be converted into GMT. Let’s create two variables, one for the sunrise and the other one for the sunset time. And, let’s also create an icon URL that we will put inside the blank `img `tag that we created before. And one more thing that we have to do is, convert the Celcius to Fahrenheit because we want to show the temperature in both the degrees. To convert the celsius to Fahrenheit, we use the formula,
**fahrenheit = (celcius \* 9) / 5 + 32**
Now our code will look something like this,
```javascript
window.addEventListener('load', () => {
let long;
let lat;
// Accesing Geolocation of User
if (navigator.geolocation) {
navigator.geolocation.getCurrentPosition((position) => {
// Storing Longitude and Latitude in variables
long = position.coords.longitude;
lat = position.coords.latitude;
const base = `https://api.openweathermap.org/data/2.5/weather?lat=${lat}&lon=${long}&appid=${api}&units=metric`;
// Using fetch to get data
fetch(base)
.then((response) => {
return response.json();
})
.then((data) => {
console.log(data);
const { temp } = data.main;
const place = data.name;
const { description, icon } = data.weather[0];
const { sunrise, sunset } = data.sys;
const iconUrl = `http://openweathermap.org/img/wn/${icon}@2x.png`;
const fahrenheit = (temp * 9) / 5 + 32;
// Converting Epoch(Unix) time to GMT
const sunriseGMT = new Date(sunrise * 1000);
const sunsetGMT = new Date(sunset * 1000);
});
});
}
});
```
And we are almost done. We have all the data that we need to show. The only thing that is left, is to access the DOM elements using JavaScript and changing the values. I am pasting the code for selecting the elements below. I think the code do not need any explanation.
```javascript
const iconImg = document.getElementById('weather-icon');
const loc = document.querySelector('#location');
const tempC = document.querySelector('.c');
const tempF = document.querySelector('.f');
const desc = document.querySelector('.desc');
const sunriseDOM = document.querySelector('.sunrise');
const sunsetDOM = document.querySelector('.sunset');
```
We are just accessing the DOM elements and storing them into separate variables. We are doing this outside the `eventListener` function.
Now, to change the src tag of an image, we access the image element using a selector, here we are selecting using the ID of `weather-icon`, now if we use the `.src` property over it, we can easily change the image source.
```javascript
iconImg.src = iconUrl;
```
We are changing the image URL with the icon URL that we stored before. Rest of the code is very simple.
```javascript
loc.textContent = `${place}`;
desc.textContent = `${description}`;
tempC.textContent = `${temp.toFixed(2)} °C`;
tempF.textContent = `${fahrenheit.toFixed(2)} °F`;
sunriseDOM.textContent = `${sunriseGMT.toLocaleDateString()}, ${sunriseGMT.toLocaleTimeString()}`;
sunsetDOM.textContent = `${sunsetGMT.toLocaleDateString()}, ${sunsetGMT.toLocaleTimeString()}`;
```
We are using template literals. The `toFixed(2)` method is used so that the degree shows up to two decimal places only. The `toLocaleDateString()` and `toLocaleTimeString()` methods are used to convert the GMT time and date to local time and date. The .`textContent` property sets the inside text with the values passed on the right side. And we are done. The complete JavaScript code will look like this,
```javascript
// Openweathermap API. Do not share it publicly.
const api = '66869939e0b182ac2d6************'; //Replace with your API
const iconImg = document.getElementById('weather-icon');
const loc = document.querySelector('#location');
const tempC = document.querySelector('.c');
const tempF = document.querySelector('.f');
const desc = document.querySelector('.desc');
const sunriseDOM = document.querySelector('.sunrise');
const sunsetDOM = document.querySelector('.sunset');
window.addEventListener('load', () => {
let long;
let lat;
// Accesing Geolocation of User
if (navigator.geolocation) {
navigator.geolocation.getCurrentPosition((position) => {
// Storing Longitude and Latitude in variables
long = position.coords.longitude;
lat = position.coords.latitude;
const base = `https://api.openweathermap.org/data/2.5/weather?lat=${lat}&lon=${long}&appid=${api}&units=metric`;
// Using fetch to get data
fetch(base)
.then((response) => {
return response.json();
})
.then((data) => {
const { temp } = data.main;
const place = data.name;
const { description, icon } = data.weather[0];
const { sunrise, sunset } = data.sys;
const iconUrl = `http://openweathermap.org/img/wn/${icon}@2x.png`;
const fahrenheit = (temp * 9) / 5 + 32;
// Converting Epoch(Unix) time to GMT
const sunriseGMT = new Date(sunrise * 1000);
const sunsetGMT = new Date(sunset * 1000);
// Interacting with DOM to show data
iconImg.src = iconUrl;
loc.textContent = `${place}`;
desc.textContent = `${description}`;
tempC.textContent = `${temp.toFixed(2)} °C`;
tempF.textContent = `${fahrenheit.toFixed(2)} °F`;
sunriseDOM.textContent = `${sunriseGMT.toLocaleDateString()}, ${sunriseGMT.toLocaleTimeString()}`;
sunsetDOM.textContent = `${sunsetGMT.toLocaleDateString()}, ${sunsetGMT.toLocaleTimeString()}`;
});
});
}
});
```
The complete source code can be found in this Github [repo](https://github.com/nemo0/js-weather-app).
# Conclusion
This was our complete weather app from scratch. You can modify it with your styles and preference. This was an attempt to break all the pieces and explain them accordingly. I hope you find it helpful. If you want to build something more using APIs, we have another article about creating a Covid tracker using JavaScript - [Create a Javascript Covid 19 Tracker](https://nemotivity.dev/create-a-javascript-covid-19-tracker-ckpm90f3d0qpyz0s177p25aft)